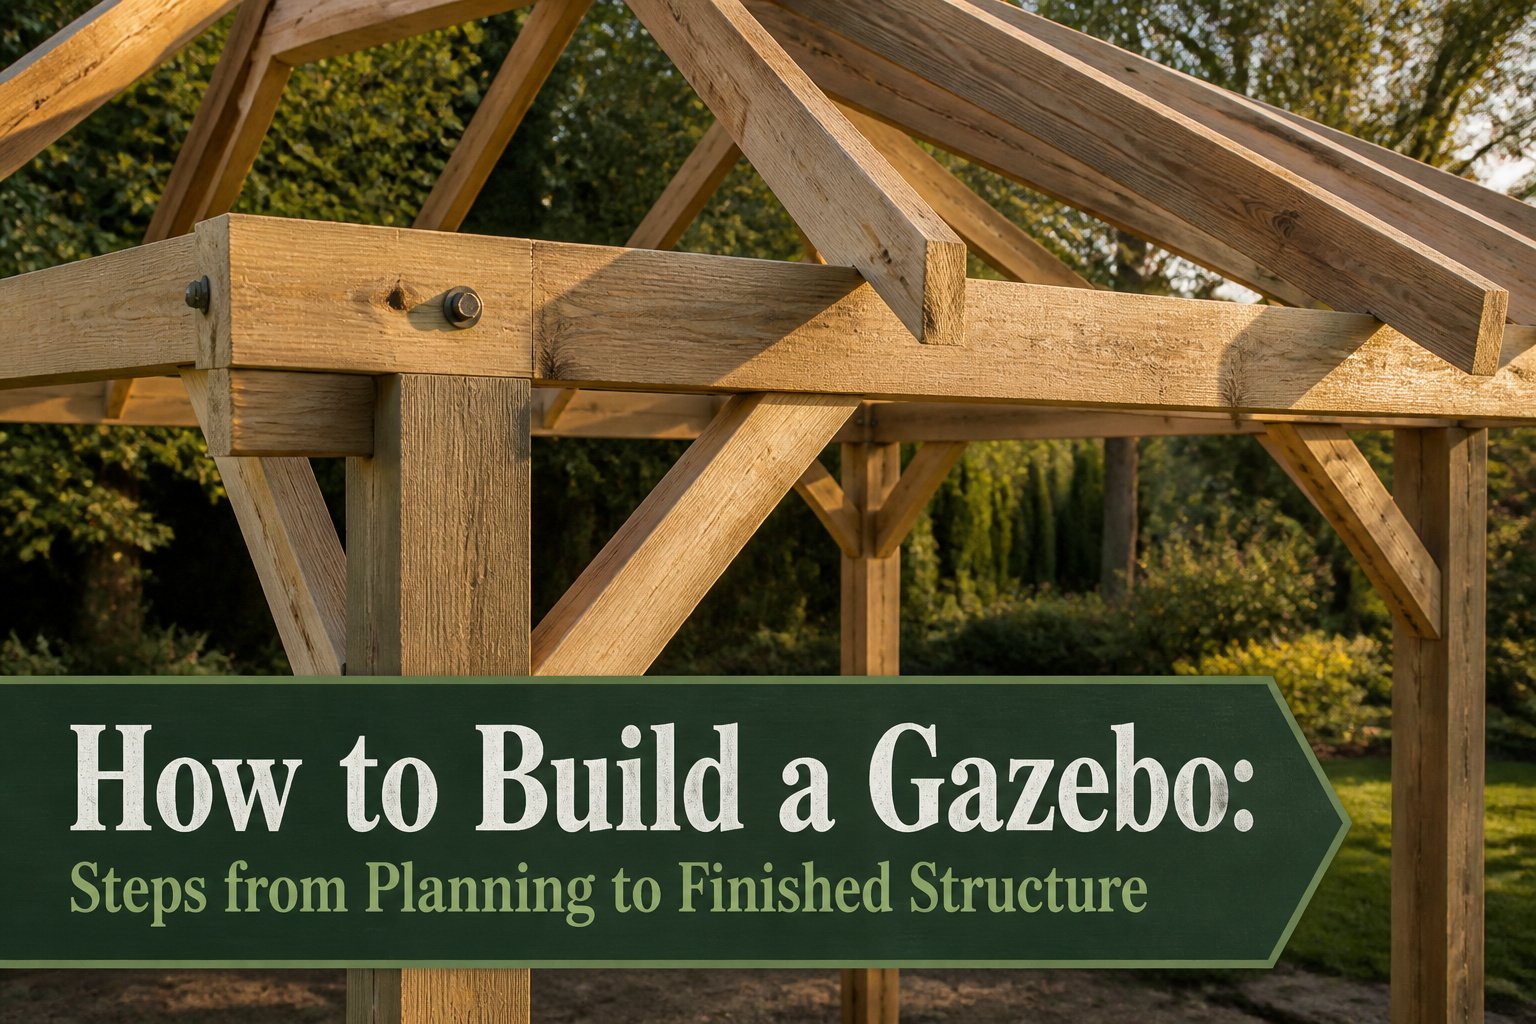
A finished gazebo takes roughly 50 hours of solo work and anywhere from $800 for a basic bracket kit to north of $5,000 once lumber and roofing join the bill.
The stage that quietly ruins most builds is squaring the frame; one post even slightly out of plumb telegraphs straight into the roof plates and leaves you fighting gaps that should not exist.
That squaring only works if you leave every bolt finger-tight until the posts read level and the corners are true, which means fighting the instinct to lock everything down as soon as it looks close enough.
1. Planning the Project

A gazebo meant for dining or entertaining needs at least 12 feet in diameter to fit a table and let people move around it.
Anything smaller works fine for a bench and a view, but you will feel cramped once you add furniture.
Shape is the next call. Square and rectangular frames are easier to build, though most gazebos run six or eight sides for the look.
That geometry changes how you cut every joint, so decide early and let it drive the material list.
Location matters as much as size. Flat or slightly elevated ground keeps water from pooling at the posts, and some sun cuts down on mold and mildew that shade promotes.
Leave two feet of clearance on all sides for air to move and for you to work around the base later.
Before you mark the footprint, check whether your town wants a permit. Structures over 10 feet tend to draw more scrutiny, and codes will tell you how far back from the property line you need to sit.
Tom Silva of This Old House still talks about the homeowner who ignored setback rules and had to tear his deck back out:
"It was supposed to be 15 feet back from the property line… The homeowner ended up having to undo the work."
That phone call to the building department costs nothing and can save you from rebuilding.
Recommended Products

Authentic Wood Look: Powder-coated teak perfectly replicates the grain, texture, and color of real wood, resulting in a natural, beautiful and low-maintenance finish.

Ample Space:Featuring the size of 19.7' L X 12.0' W x 10.0' H, this outdoor gazebo offers generous amount of space, allowing you and your family to enjoy the outdoor joyful time. It is able to accommodate a number of people at a time for recreational activities and entertainment

The Ideal Outdoor Companion: Whether you're camping or having a family gathering, this 10x12 ft gazebo cover provides solid protection, ensuring you enjoy a comfortable experience during your outdoor activities. Please note: Our gazebo covers are suitable for most hard-top gazebos or wooden gazebos, but not suitable for soft-top gazebos or tents.
2. Choosing Materials

Cedar and redwood carry the natural rot resistance that makes wood worth the trouble, though pressure-treated pine will do the budget work if you keep up with sealing.
Metal, usually aluminum or wrought iron, outlasts both and asks almost nothing of you after assembly.
Vinyl gets sold as maintenance-free, which is mostly true: you trade the grain and weathering of wood for a surface that hoses clean and never checks or splinters.
| Material | Durability | Maintenance | Best for |
|---|---|---|---|
| Cedar / redwood | Moderate, shorter lifespan than metal or vinyl | Regular sealing, rot checks | Natural look, willing upkeep |
| Pressure-treated pine | Moderate, requires protection | Frequent sealing required | Tightest budget |
| Metal (aluminum, wrought iron) | Longest lasting | Minimal | Set-it-and-forget-it builders |
| Vinyl | Long, marketed as maintenance-free | Near none | Clean modern appearance |
Metal wins on longevity, vinyl wins on laziness, and wood wins only if you genuinely want to re-stain it every couple of seasons.
I go cedar when the gazebo sits among garden beds where a weathered gray post looks right, and metal when the structure is the architecture itself.
3. Preparing the Site

The ground where a gazebo sits has to do two jobs at once: stay flat enough for the frame to line up, and stay dry enough that the wood does not rot from underneath.
I start by stripping the top layer, roots and all, until I hit firm soil. A slope is fine as long as you work with it; what fails is a low spot where rainwater pools after every storm.
Leveling follows clearing, and it is worth doing with a long board and a level rather than eyeballing it.
Small dips can be filled and compacted, but a pronounced slope usually means cutting into the high side rather than building the low side up, because loose fill settles and the gazebo will not.
Footings are where the real work happens. In any climate where frost reaches down, dig footings at least 18 inches deep so the freeze-thaw cycle does not heave them sideways over the years.
Where frost is not a concern, that depth still holds, or you can pour a 4-inch thick concrete slab and build directly on that slab as your floor.
The slab route saves separate pier work but commits you to one exact footprint; footings let you adjust the frame a little if your measurements drift. Either way, drainage matters more than the choice itself.
I grade the surrounding soil to carry water away from the structure, never toward it.
Recommended Products

Fits Standard 6×6 Posts – Designed for standard 6×6 posts with an actual size of approximately 5.5” × 5.5”. The 142 × 142 mm (5.59” × 5.59”) inner size fits standard-size lumber. Pressure-treated wood may vary slightly in size.

Set of 6 post caps complete the look of any nominal 6 in. x 6 in. wood posts (inside dimensions 5-5/8 in. x 5-5/8 in.)

Set of 12 post caps complete the look of any nominal 4 in. x 4 in. wood posts (inside dimensions 3-5/8 in. x 3-5/8 in.)
4. Constructing the Frame

A pair of sawhorses topped with plywood gives you the flat surface you need to start fitting the fascia boards that connect the posts.
Most kits arrive with pre-drilled holes, and the better ones line up precisely, the connectors pulling tight on both sides for a clean joint.
I clamp the boards first, then stand the assembled back section while a scrap board nailed across two surfaces acts as a third pair of hands to brace the third post.
With the fourth post in place, the bolts go in finger-tight so you can still shift the frame.
Do not fully tighten anything until every post reads level and the corners are square. The gussets that bolt on afterward add stiffness and a bit of style, but they cannot correct a frame that was forced out of true.
A post even slightly out of plumb here telegraphs straight into the roof plates, and you will spend the next phase fighting gaps that should not exist.
Two people can manage this, though the squaring takes noticeably longer without extra hands to hold a tape or sight a corner while you adjust.
Recommended Products

SPECIFICATION: This wind panel with a side length of 64" x 66.7 and a weight of 2.65 pounds, suitable for 11.5 ft of gazebos.
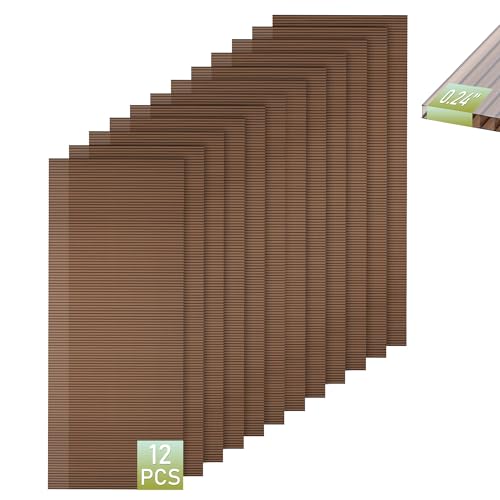
Ultra-Durable Roof Panels - These twin-wall polycarbonate panels are built to handle sun, rain, snow, and wind—perfect for outdoor structures like greenhouse, gazebos and patio covers

Solid Cedar Wood Frame: Crafted with FSC-certified cedar wood, this wood hardtop gazebo offers exceptional durability, strength, and long-lasting performance. Its heavy-duty construction and ground stake design ensure reliable stability.
5. Installing the Roof

Once the frame is square and secure, the roof goes on. Three materials cover most gazebo builds, and each carries a different maintenance load.
Asphalt shingles run cheapest and come in enough colors to match most siding, though they will need replacement sooner than the alternatives.
Cedar shakes look traditional and weather to a soft silver, but that natural beauty costs time; they demand the most upkeep of the three and tend to have the shortest lifespan.
Metal roofing costs more upfront and lasts longer with less attention, which usually wins for anyone who would rather garden than climb a ladder.
Copper sits at the luxury end and develops its own patina, though most builders treat it as a specialty option rather than a standard choice.
Sealing matters more than the material itself. Every seam where the roof meets the frame, and every joint in the sheathing underneath, needs flashing and a weatherproof membrane before the finish layer goes down.
Skip this and water finds the gap within two seasons.
A roof panel on a full-sized gazebo gets heavy fast. One person can manage the layout and cuts, but lifting and holding a sheet in place while fastening it is awkward and risky.
A second pair of hands, or a rented panel lift, keeps the job square and keeps you off the ground.
Recommended Products

Premium 2.5mm Reinforced Steel Construction:Crafted from upgraded 2.5mm thick galvanized steel (thicker and stronger than standard 2mm market brackets), these pergola brackets deliver enhanced structural integrity and long-term durability. The extended 5.9-inch design provides greater support surface and improved weight distribution, ensuring a more stable and secure pergola structure for heavy-duty outdoor projects.

Sturdy Structure: 15° and 75° 3-Way Slanted Pergola bracket set is made of high quality carbon steel, which has excellent wear resistance, corrosion resistance, and rust resistance, effectively extending the service life of the steel support frame of the pergola kit. You can use this high-quality material frame to build a stable pergola structure.

🔩【Complete DIY Pergola Kit – 3-Way & 4-Way Brackets + Post Bases】 This pergola kit includes 4 three-way corner brackets, 2 four-way center brackets, and 6 post bases for a complete do it yourself pergola build. A true pergola hardware kit covering top to bottom, so you don't need to buy separate gazebo hardware kit components.
6. Finishing Touches

The paint or stain goes on after a full day of dry weather, and I always end up needing two coats even when the can promises one.
Cedar takes stain beautifully; pressure-treated lumber needs a season of curing first or the finish will peel within a year.
A solid-color stain hides more than paint does and costs about the same, so that is what I would reach for on anything I did not want to show knots through.
Screens come next if you are building for summer evenings.
Removable panels let you swap them for sliding lattice when you want privacy instead of bug protection, and that lattice option turns a gazebo into something you can actually change clothes inside.
I have seen people skip the screen kit and staple yard-sale netting around the posts; it looks like a yard-sale project and sags by August.
Electrical work means a licensed electrician, full stop, because local codes vary and the inspector will want to see a permit.
Outlets inside let you run a reading lamp or a blender without extension cords snaking across the lawn, and a single overhead fixture on a dimmer changes the whole mood after dark.
Pool-style uplighting in the floor is dramatic from the garden path but tricky to retrofit; run the conduit during construction or plan to do without.
What Size Fits Your Space

A 12-foot diameter is the practical minimum if you plan to eat or entertain inside the gazebo. Anything narrower than that will not fit a table and chairs, or more than six people at once.
For a purely decorative piece tucked into a garden bed or used as an architectural accent, an 8-foot span or smaller works fine and keeps the structure from overwhelming the planting around it.
Measuring your actual yard space takes a little more than pacing it off. Mark out the footprint with stakes and string, then step back and picture the roofline from your kitchen window or patio door.
A landscape architect I follow on a project once noted that a gazebo is rarely too big, but it is often too small; the mistake is usually in underestimating how much breathing room the structure needs to feel intentional rather than cramped.
Leave at least 2 feet of clearance on every side for maintenance access and air circulation.
That buffer lets you walk around with a hedge trimmer, keeps the wood from staying damp against planting, and discourages insects from nesting in the tight gap between post and shrub.
Trim back any low vegetation near the base once the gazebo is up; the airflow matters more after construction than before.
Recommended Products

【All Aluminum Top & Superior Load Capacity】 The aluminum roof and column structure underwent complete structural engineering tests to ensure the stability of this gazebo. Securely affixed to both wall and ground, this pergola boasts a formidable wind resistance up to 38mph and effortlessly carries up to 6 inches of snow. Crafted with a remarkable 55lbs/㎡ load-bearing capacity, it stands firm against harsh conditions like heavy snowfalls and downpours

【Versatile Spare Parts】Includes 9x spare parts for 3x3m gazebo tent, suitable for various replacement needs.

Excellent Load-Bearing:With the impressive and great load-bearing of 55lbs/㎡, this pergola is able to endure heavy snow or rain, and challenge other bad weather conditions. You have to fasten it securely on the wall and ground so it can better work
Picking a Location That Lasts

A gazebo left in shade all day will collect mold and mildew faster than one that sees some sun, so I start by watching how light moves across the yard for a full day before marking any spot.
The ground itself matters just as much: flat or slightly elevated ground drains better and keeps the frame from twisting, while low spots where water pools after rain will shorten the life of any wood that touches soil.
Leave at least 2 feet of clearance on every side for air to move through and for you to reach all sides with a paint brush or pressure washer later.
I trim back any vegetation low enough to lean against the base, since damp leaves against the posts invite insects and rot in equal measure.
Square, rectangular, six-sided, or eight-sided, the shape you choose still has to fit the actual space once those clearances are in place, so I pace it out with stakes and string before ordering a single board.
Recommended Products

Premium 2.5mm Reinforced Steel Construction:Crafted from upgraded 2.5mm thick galvanized steel (thicker and stronger than standard 2mm market brackets), these pergola brackets deliver enhanced structural integrity and long-term durability. The extended 5.9-inch design provides greater support surface and improved weight distribution, ensuring a more stable and secure pergola structure for heavy-duty outdoor projects.

ENGINEERED CLAMPING FORCE The partially threaded design allows the smooth shank to pass through the outer board, pulling timber members together for a gap-free structural joint.

ULTIMATE CLAMPING POWERThe 5 length with a partial thread allows the shank to bypass thick boards, pulling heavy timbers together for a gap-free, rock-solid joint.
Roofing That Matches Your Climate

Asphalt shingles are the default most people picture, and they handle moderate weather fine for a decade or so before the granules start shedding.
Metal costs more upfront but shrugs off heavy snow and driving rain; the panels click together fast, which matters when you are working alone on a ladder.
Cedar shakes look warm and smell better than either, yet they demand staining every few years and will curl in humid climates if you skip it.
| Asphalt shingles | Metal | Cedar shakes | |
|---|---|---|---|
| Lifespan | 12–20 years | 40–70 years | 20–30 years with care |
| Maintenance | Replace individual damaged shingles | Hose off debris, check fasteners | Stain or seal every 2–4 years |
| Best for | Mild, dry zones; tight budgets | Heavy snow, high winds, fire-prone areas | Dry climates where rot risk stays low |
I put metal on my own gazebo after watching a neighbor re-shingle twice in fifteen years.
The rain noise is louder, which some people mind, but you will never need to think about the roof again while you are still living in the same house.
If you want cedar for the look, budget the time for upkeep or plan on replacing it sooner.
Permits and Codes to Check First

Local building departments often require permits for gazebos over 10 feet in any dimension, and foundation rules shift with climate and structure size. Check before you buy a single board.
The 10-foot threshold is the common cutoff, though some jurisdictions draw the line elsewhere or add setback rules that push your buildable area inward from property lines.
What to ask is straightforward: whether your planned size triggers a permit, what foundation type the code demands for your frost line and soil, and how far the structure must sit from boundaries.
I have watched enough projects stall to know that "I’ll sort it out later" means tearing out finished work when an inspector flags it.
Tom Silva, the general contractor from This Old House, once described a homeowner who gambled on a 15-foot setback and lost; the deck came back out, piece by piece, at full cost. The building department visit takes an afternoon.
The undoing takes weeks.
Recommended Products

[Firm and Steady Construction]Manufactured from heavy-duty carbon steel and plated with black powder,these pergola hardware is stable enough to support the pergola and improve its service life.precision welding techniques ensure resistance against breakage and deformation,enhancing the pergola's stability.

4" x 4" Four-Way Pergola Brackets: This durable and strong pergola bracket kit that covers wooden beams, preventing them from rotting due to rainwater and harsh sunlight. It is designed for the mainstream 4" x 4" specifications and can accommodate actual dimensions of 3.6 x 3.6 inches (92 x 92 mm) for both soft and hardwood.

Stable and Durable : The 45 degree angle pergola brackets are made of heavy duty steel with black powder coated finish a as well as being moisture and sun resistant, ensure that the pergola structure is stable and safe.
Kit Costs and Time to Build

A DIY gazebo kit from Bjorn Woodworks starts at $799, which gets you the bracket system and hardware but not the lumber or roofing. That price climbs quickly once you add timber, shingles, and whatever posts you settle on.
A 12’x14′ cedar patio gazebo kit runs closer to $1,399, and Amish Country Gazebo kits span anywhere from $5,000 to $50,000 depending on size, material, and how custom you want the build.
Time works about the same way. The bracket kits advertise assembly in a couple of days with a chop saw, a drill, and a few friends on hand.
Figure roughly 50 man-hours for a standard DIY kit if you’re working alone, more if you’re pouring footings or wrestling with a roof alone. Complexity and headcount change that estimate fast.
A simple four-post structure with a helper goes up in a weekend; a 12-foot span with privacy walls and a custom roof eats a week, and you will want that second pair of hands for the ridge beam.
Frequently Asked Questions
What size should a gazebo be?
A gazebo meant for dining or entertaining needs at least 12 feet in diameter to fit a table and let people move around it. Anything smaller works for a bench and a view, but will feel cramped once you add furniture.
If the gazebo is purely decorative or tucked into a garden bed, 8 feet or smaller keeps it from overwhelming the planting around it.
What materials are best for building a gazebo?
Cedar and redwood offer natural rot resistance, pressure-treated pine works for tight budgets if you seal it regularly, metal outlasts both with minimal upkeep, and vinyl hoses clean and never splinters but lacks wood’s grain and weathering.
Metal wins on longevity, vinyl wins on low maintenance, and wood wins only if you genuinely want to re-stain it every couple of seasons.
How long does it take to build a gazebo?
A bracket kit advertises assembly in a couple of days with a chop saw, a drill, and a few friends.
Figure roughly 50 man-hours for a standard DIY kit if you are working alone, more if you are pouring footings or handling the roof by yourself.
A simple four-post structure with a helper goes up in a weekend; a 12-foot span with privacy walls and a custom roof eats a week.
Is it cheaper to build your own gazebo?
A DIY gazebo kit from Bjorn Woodworks starts at $799 for brackets and hardware only, while a 12’x14′ cedar patio gazebo kit runs closer to $1,399. Amish Country Gazebo kits range from $5,000 to $50,000 depending on size, material, and customization.
Whether building from scratch or using a kit saves money depends on your lumber sourcing and how you value your time against prefabricated precision.
How much would it cost to build a 12×12 gazebo?
Bracket-only systems start at $799 and require you to supply all lumber and roofing separately.